


 LIMITED TIME
Last Sale Of The Year!
Up to 20% off at checkout on the YoraHome Store.
Grab All The Yoras You Want!
Carving Machines
15% off Yora 3018-Pro Machine
15% off Yora 3018-Pro Accessories
$100 off Yora SilverBack Machine
8% off Yora SilverBack Accessories
15% off Yora Router Bits
Laser Engravers
15% off Yora 6550 Machine
15% off Yora 6550 Accessories
15% off Yora Mini Laser Engraver
15% off Yora Draw
$200 off Yora CO2 Laser Engravers
$200 off Yora Fiber Laser Engravers
3D Printers
$10 off Yora Ender-3 V2
$30 off Yora CR-6 SE
$40 off Yora Ender-5 Pro
→Each printer comes with 3x Free bonus items
3D Filaments And Accessories
20% off Yora PLA Filaments
15% off Yora 3D Printers Accessories
1x Free Yora Filament Dryer For 1x 3D Printer + 5x PLA Filaments or 10x PLA Filaments
Woodworking Tools: 20% off
Home And Office Accessories: 20% off
Get Amazing Free Items With The Gorilla Bundles!
#1: 1x Free Yora 3018 Essential Bits For 1x Yora 3018 + 1x Yora 6550
#2: 1x Free Yora Rotate Module For 1x Yora 6550 + 1x Yora Draw
#3: 1x Free Yora Filament Dryer For 1x Yora 6550 + 1x 3D Printer
#4: 1x Free Yora TLC Rotary For 1x Yora 3018 + 1x Yora 6550 + 1x Yora Draw
#5: 1x Free Yora 6550 Z-Axis, Drag Chain, Air Assist and 3D Led Lamp For 1x Yora 3018 + 1x Yora 6550 + 1x Yora 3D Printer
Terms Apply
10 Tips For Laser Engraving And Cutting
As much fun as laser engraving and cutting is, safety must come first.
1. Stay Safe
Take care of your eyes: Appropriate eye protection needs to be worn to avoid serious & permanent damage to your eyesight.
NEVER LOOK DIRECTLY INTO ANY LASER BEAM. Choose goggles appropriate to your machine.

For the YoraHome range of lasers, these Blue-Violet Laser Protective Goggles 200-540nm are perfect, and each machine comes supplied with 1 pair. You can order extra ones for family or friends to be able to watch you at work.
All our lasers are also equipped with a laser shield for additional eyes protection.
Ventilate the work area: Laser engraving and cutting can generate smoke & fumes, make sure your work area is well ventilated and that you can get rid of any smoke or smell.
Never leave the working laser unattended: You can adjust settings or turn off the laser if you need to if you are with it, you can’t if you’re not there.
2. Align your work piece and your machine
This makes it look obvious, but you get the idea.
You need to ensure that your work piece is aligned to the movement of the machine.

You can mark up the available work area as a grid and align the work piece on there, that way your engraving or cutting will be where you want it to be.
3. Use scrap material
Do not use the piece you intend to make the finished article from to start with!
Use a scrap piece of the same material to get your settings right first.

You can make fine setting changes once the job starts but getting the settings as close as you need to begin with saves a lot of heartache and firewood.
4. Choose a good material
Different materials will react very differently.
For example, natural wood is not uniform. The grain represents different growth periods and will burn differently, darker bits are harder and lighter bits softer – this can lead to a “zebra” pattern as below.

You can often get a better result from a good plywood if you after a clear, crisp engraving.
But remember, wood isn’t the only thing you can use your laser on. General guides for what you can engrave depending on power are as follows:
3W: Wood, plastic, leather, paper, textiles, slate
5.5W: Wood, plastic, leather, paper, textiles, slate, glass
15W & 40W: Wood, plastic, leather, paper, textiles, slate, glass, anodized aluminium and coated stainless steel
Make sure the material you choose is safe to cut or engrave, as some plastics can produce hazardous chemicals when burned.
5. Choose a good image
Depending on the software you are using with your machine, you can import different formats.

With the YoraHome diode or CO2 laser engravers, the most commonly used software is LaserGRBL and LightBurn; and through the image import function, you can use bmp, jpg, png and gif file format as well as Gcode.
You can use photographs, diagrams, text, whatever you want to try.
Just try, you may be pleasantly surprised at your results.
6. Focus
Probably the thing that will affect the quality of your engraving or cutting will be whether you have focused the beam correctly.

You are aiming to adjust the beam to the smallest & sharpest pinpoint you can achieve. Don’t go too far as it will start to distort again.
You may need to adjust the height of your material to get a small enough beam, you can use our Z-axis for the Yora 6550, or our adjustable lifting platform to bring your material closer to the laser, rather than getting the laser closer to the material.
7. Mask
Depending on your material choice, sometimes masking it will make a big difference.
Using masking paper over acrylic stops the immediate reflection of the laser.
Masking wood and leather can prevent charring around the edges of the burn.
![]()
Always try your setting out on a piece of scrap first, to see if masking will be useful or not.
8. Use cross hairs & framing tools
Finding your starting position is much easier when you use framing tools.
In LaserGRBL, you can use custom buttons to set up a framing tool, turn your laser on and off and a number of other useful actions.

This will draw the area on your material that your image is going to take up, so you can check you are centred and ready to go.
9. Take notes
Make a note of everything you do: the material used, the size of the image, the settings you used, whether the result came out as expected, the time it took and so on.
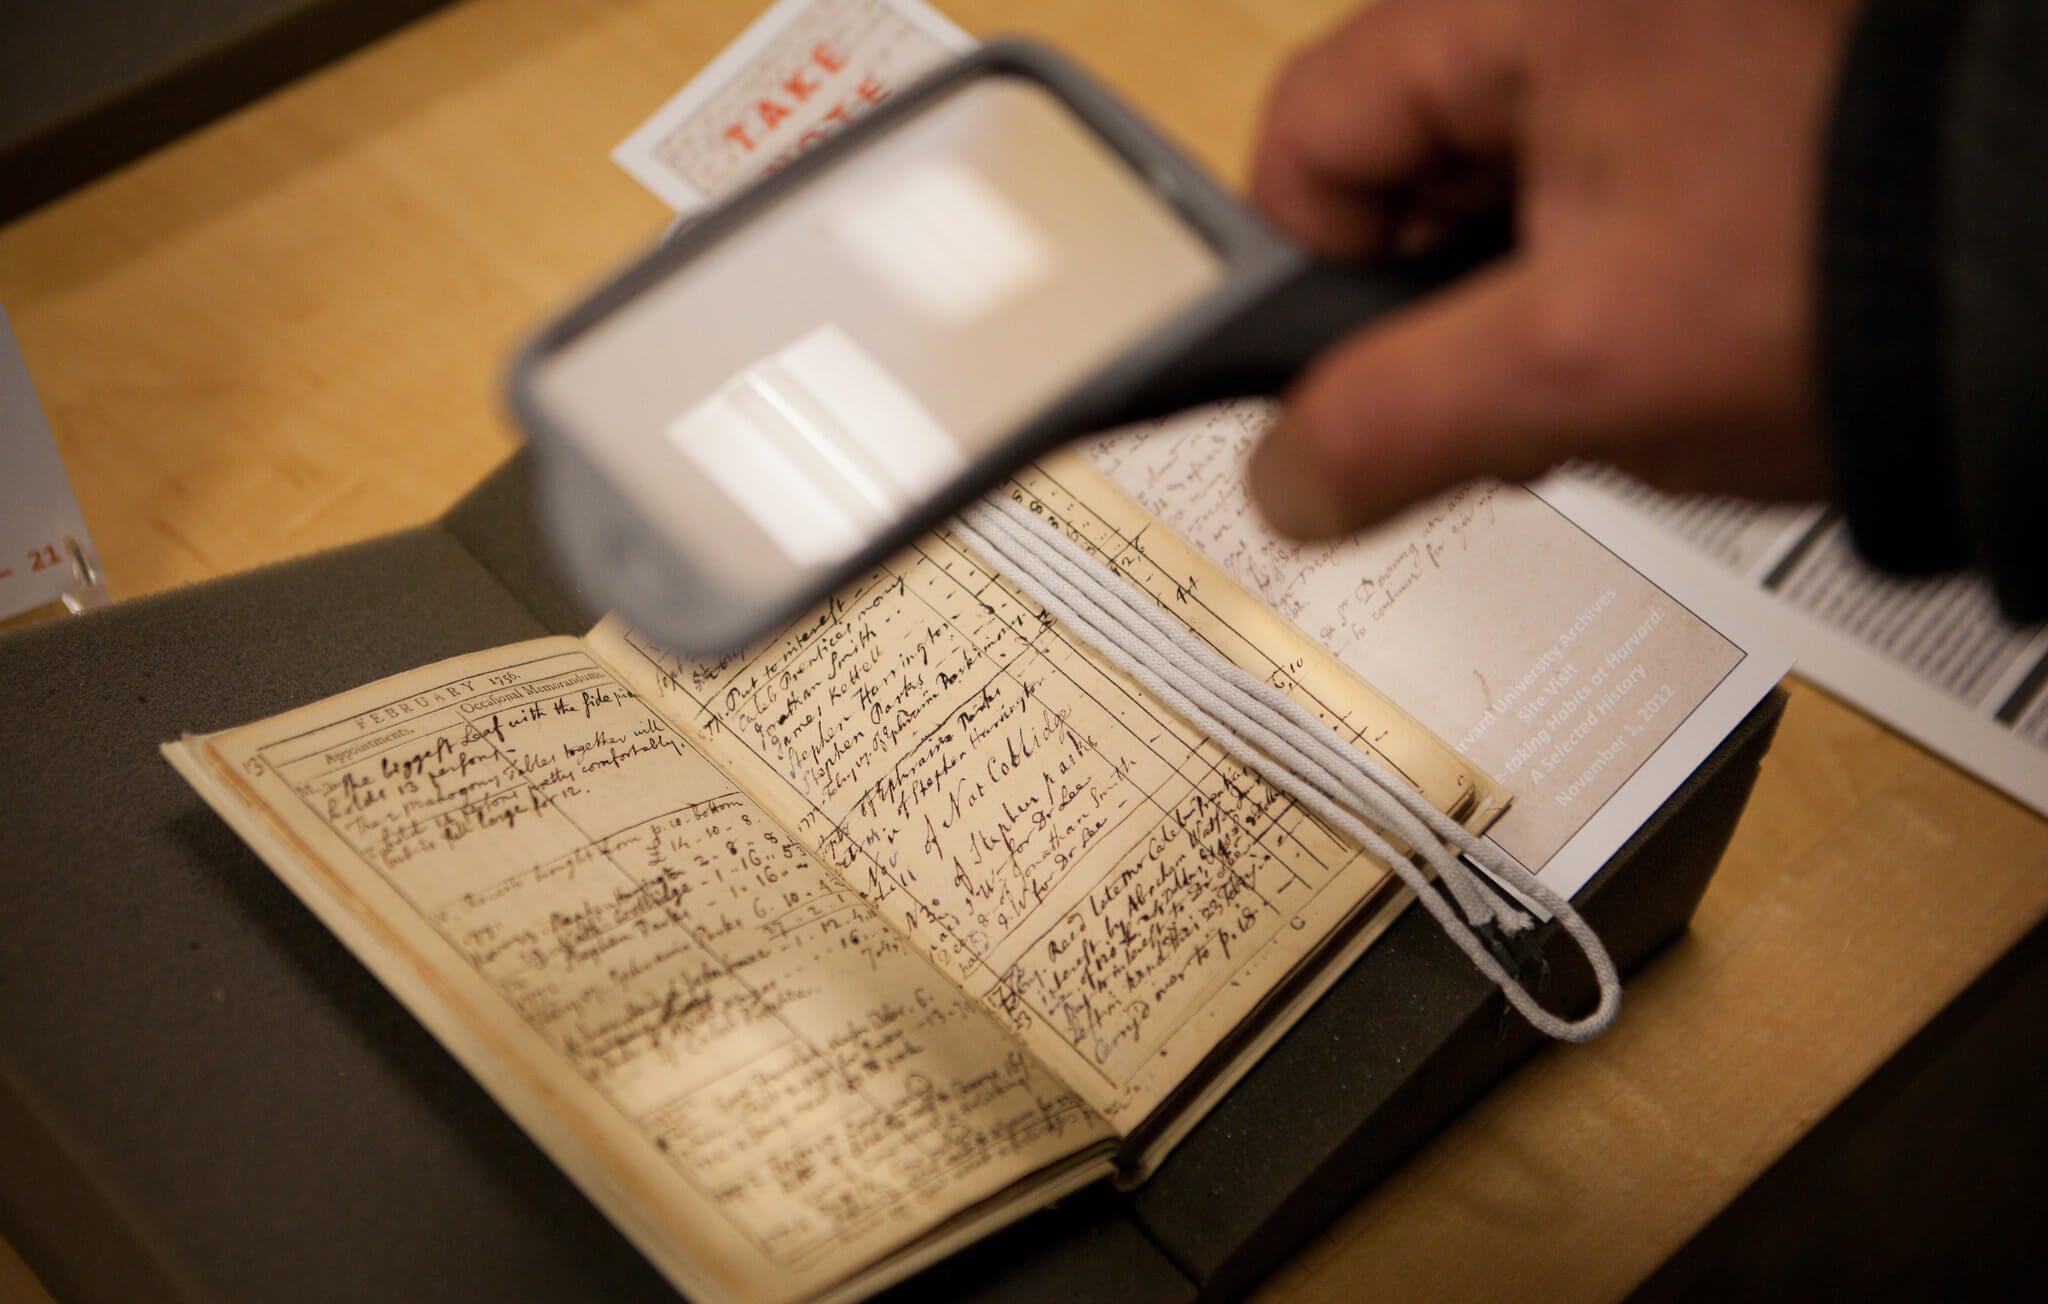
Keep a notebook at the side of your machine and try to enter something every time you use the machine, that way you can always refer back to what you’ve done previously.
10. Practice
The best and most important tip for using your laser engraver and cutter is to practice.
You will never get any worse at doing something by practicing. You will only improve your techniques.
If something doesn’t work, learn from it and try something else.
Remember: Have fun with your machine!


Free
Shipping!
Free & Fast Delivery With shipping companies like DHL Express, UPS, FedEx Express, USPS, Royal Mail & TNT.
Have
Questions?
We're happy to help!
For all general inquiries, please send an email at support@yorahome.com or call 833-541-5997.