


 LIMITED TIME
Last Sale Of The Year!
Up to 20% off at checkout on the YoraHome Store.
Grab All The Yoras You Want!
Carving Machines
15% off Yora 3018-Pro Machine
15% off Yora 3018-Pro Accessories
$100 off Yora SilverBack Machine
8% off Yora SilverBack Accessories
15% off Yora Router Bits
Laser Engravers
15% off Yora 6550 Machine
15% off Yora 6550 Accessories
15% off Yora Mini Laser Engraver
15% off Yora Draw
$200 off Yora CO2 Laser Engravers
$200 off Yora Fiber Laser Engravers
3D Printers
$10 off Yora Ender-3 V2
$30 off Yora CR-6 SE
$40 off Yora Ender-5 Pro
→Each printer comes with 3x Free bonus items
3D Filaments And Accessories
20% off Yora PLA Filaments
15% off Yora 3D Printers Accessories
1x Free Yora Filament Dryer For 1x 3D Printer + 5x PLA Filaments or 10x PLA Filaments
Woodworking Tools: 20% off
Home And Office Accessories: 20% off
Get Amazing Free Items With The Gorilla Bundles!
#1: 1x Free Yora 3018 Essential Bits For 1x Yora 3018 + 1x Yora 6550
#2: 1x Free Yora Rotate Module For 1x Yora 6550 + 1x Yora Draw
#3: 1x Free Yora Filament Dryer For 1x Yora 6550 + 1x 3D Printer
#4: 1x Free Yora TLC Rotary For 1x Yora 3018 + 1x Yora 6550 + 1x Yora Draw
#5: 1x Free Yora 6550 Z-Axis, Drag Chain, Air Assist and 3D Led Lamp For 1x Yora 3018 + 1x Yora 6550 + 1x Yora 3D Printer
Terms Apply
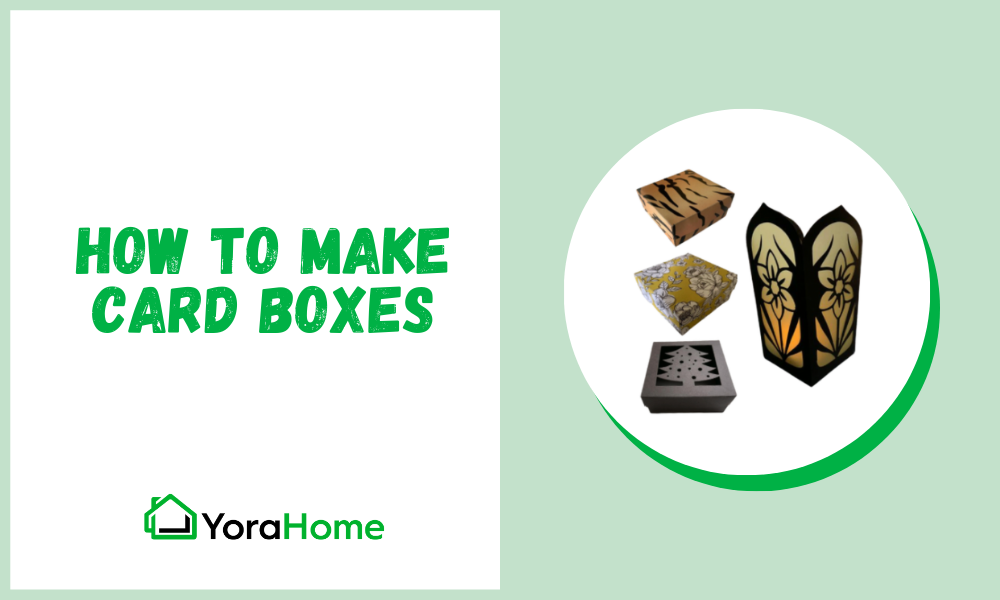
How To Make Card Boxes

Christmas before last I got a YoraHome 3018, well truthfully, I helped myself to my partner Shaun’s Yora 3018.
This was the start of a whole new episode in my life, Christmas last year was massively busy making and selling lots and lots of Christmas decorations on my Yora 6550.
And this year, I’ve got a new Yora 40W CO2 Laser Engraver with an open base for unlimited projects coming...

You may well get the impression that I am obsessed with Christmas, well obsessed might be in the right realm anyway. I love it!!!! Choosing presents for everyone, decorating the tree – real of course, but only in the week before Christmas Eve, the food, the sweeties, the chocolate, mince pies, Christmas pudding all of it. The only thing I don’t like is wrapping presents – it always looks like me, the present and the wrapping paper had a fight, and nobody won.
Well, as my Yora machines are getting put to work to make Christmas presents this year, I don’t want to spoil the effect by wrapping them in my usual fashion, so time to try something better.
Step forward to the YoraHome CNC Laser Engraving Machine 6550 and the fixed focus 40W laser and a bunch of colored cards!
OK, anyone that has read any of my blogs before knows that I am a LaserGrbl fan. It is easy to use and simple to get it to do what I want.
But, I know lots of people love Lightburn, I have said for a long time that Lightburn hates me, I just never quite got it, but the time had come to bite the bullet and get to grips with it as it allows certain tasks to be completed that I just can’t do in LaserGrbl.
Having loaded up Lightburn and connected the 6550, the Lightburn screen sat there looking at me accusingly.

A quick aside here, there are lots of websites out there that allow you to design boxes free for cutting from paper or card:
Templatemaker (my personal favourite)

So, I picked a simple looking box and filled in the sizes I wanted, pressed create and the design downloads.

Click on Open File to see the design.

Then Zoom Out to see the whole thing.

Save the design.

In Lightburn click on File, then Open, search for the file.

Remember to change the file type in the dropdown menus from Lightburn Files to All Supported.

When you click to open, the file may be only faint.

Using the Select Arrow in the top left, draw an oblong around the shape to select it all and then click on the color of your choice on the bottom – I use Red for cuts.

Select the writing in the same way to delete.


As you can see all the lines at present are red – so they’d all cut at this point and you don’t want to have to stick it all back together again, so to change the fold lines, select each in turn.

Click on another color – I use Blue for engrave lines (fold lines).

This will add a different “layer” that you can adjust the speed and power, obviously, you’ll need less power for a fold than a cut
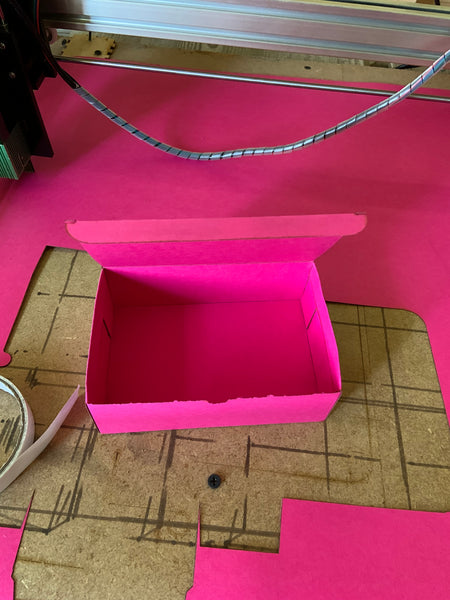
I admit it, I couldn’t wait, and went back to my wing-it approach to trying something new.

Well, it cut and folded, but wasn’t quite perfection shall we say.
Having learned my lesson (again), I took a breath, and using the Create Rectangle Tool, I drew a small rectangle and made it red.

Double clicking on the Cuts/Layers Line opens the Cut Settings Editor where you can change speed, power, number of passes, and so on.


I’ll not bore you with all the trials and tests, but I did quite a few to get to where the cut was clean and sharp the rear was not burned, nor was the front covered in soot.

So, time to try again with what I now expected would be the correct settings.
Word to the wise here, don’t run out of the color of the card you want to use, as you’ll have to test another color to get those settings right.
But, here we go.

New design to try.

And have a look at this.

Different colors may take a bit of trial and error, but the results are worth it.


Using cards with different designs on each side looks fabulous too.

But happy with the process now, I upped the ante shall we say.

And ooh, get a load of this, I put a bit of colored vellum in behind the sides and placed a battery led candle inside.

And just in case you were thinking that this type of thing is only possible on a big machine with a big laser, I actually did this on the Yora Draw with a 5.5W laser.


Now, no one has an excuse for poorly wrapped presents this year, especially not me. All you need is a YoraHome Laser Engraver, some cards and a little bit of patience to get the cut settings right; then, you can make any shape and style box.
So, getting making the presents and then make the boxes to put them in. Bring on Christmas; this year, we don’t need to be embarrassed by our wrapping skills thanks to YoraHome.


Get The Freshest Content
Straight To Your Inbox
Join over 3,000 creators who receive premium content, exclusive discounts, and all the must-know info on a weekly basis.