


 LIMITED TIME
Last Sale Of The Year!
Up to 20% off at checkout on the YoraHome Store.
Grab All The Yoras You Want!
Carving Machines
15% off Yora 3018-Pro Machine
15% off Yora 3018-Pro Accessories
$100 off Yora SilverBack Machine
8% off Yora SilverBack Accessories
15% off Yora Router Bits
Laser Engravers
15% off Yora 6550 Machine
15% off Yora 6550 Accessories
15% off Yora Mini Laser Engraver
15% off Yora Draw
$200 off Yora CO2 Laser Engravers
$200 off Yora Fiber Laser Engravers
3D Printers
$10 off Yora Ender-3 V2
$30 off Yora CR-6 SE
$40 off Yora Ender-5 Pro
→Each printer comes with 3x Free bonus items
3D Filaments And Accessories
20% off Yora PLA Filaments
15% off Yora 3D Printers Accessories
1x Free Yora Filament Dryer For 1x 3D Printer + 5x PLA Filaments or 10x PLA Filaments
Woodworking Tools: 20% off
Home And Office Accessories: 20% off
Get Amazing Free Items With The Gorilla Bundles!
#1: 1x Free Yora 3018 Essential Bits For 1x Yora 3018 + 1x Yora 6550
#2: 1x Free Yora Rotate Module For 1x Yora 6550 + 1x Yora Draw
#3: 1x Free Yora Filament Dryer For 1x Yora 6550 + 1x 3D Printer
#4: 1x Free Yora TLC Rotary For 1x Yora 3018 + 1x Yora 6550 + 1x Yora Draw
#5: 1x Free Yora 6550 Z-Axis, Drag Chain, Air Assist and 3D Led Lamp For 1x Yora 3018 + 1x Yora 6550 + 1x Yora 3D Printer
Terms Apply
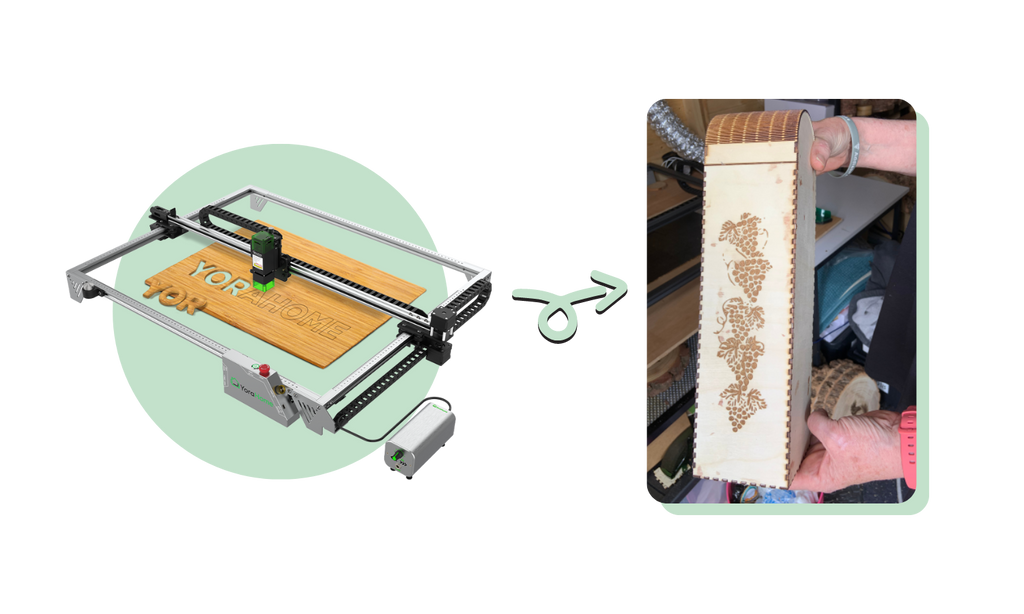
Making A Living Hinge Using The 6550-Pro (All-In-One System)

It’s so hard to choose between my new YoraHome machines. They all offer so many options of what they are capable of.
But this time, I’ll try to focus on the 6550-Pro. However, I’ll probably run something on the Mandrill at the same time, can’t help myself – too many toys, too little time!

What Can the 6550-Pro do?
So, the YoraHome CNC Laser Engraving Machine 6550-Pro (All-In-One System) with its 80w diode laser is a big beefy beast capable of doing things that previous diode machines were not even close to doing; things you could only do with a CO2 machine.
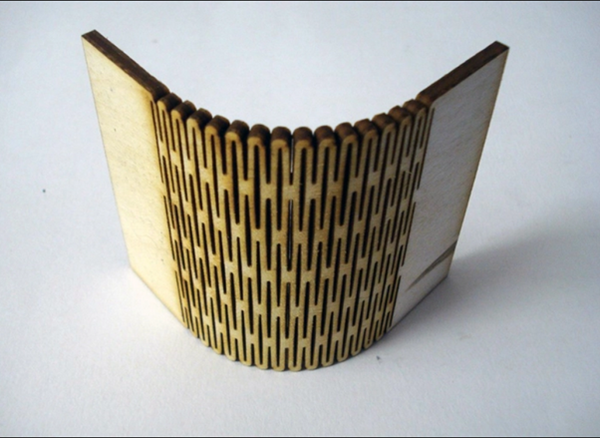
One of those is living hinges – if you’ve never heard the expression, you will have seen them in various forms, jewelry, chairs, boxes, etc.
Making a Box
Well, I seem to spend a small fortune on buying SVGs and STL files from places like Etsy, so it was time to try doing something myself and I’ll show you just how easy using a living hinge to make a fabulous box can be.
There is a fantastic website that generates box shapes and its available at boxes.py, others are available, but this is the easiest one to use I’ve found.

Material Thickness
You need to check the thickness of the material you’re about to use. The ideal way to do it, is with the YoraHome 6 Inch Stainless Steel Digital Calipers. You might have bought what you thought was 3mm ply, but it might be 3.1 or 3.2, so check first.

Burn Testing
You then need to work out how much burning the wood will adjust the actual cut size. It’s referred to as edge burn, but to show easily, see the diagram below.

So, what difference will that make you ask? When you make boxes, the joints holding the pieces together are made of “fingers” that slot together, an in and an out.

Therefore, you need to account for the difference. Thankfully you can do a burn test in boxes.py and then adjust accordingly. On the opening page, go to Parts and Samples and open BurnTest.

Having checked my 2.50 mm birch ply, it turned out to only be 2.2 mm. (Think I need to speak to my supplier on that), so I put that figure in and the pressed Generate.

This will create an SVG file to test the burn. Save the SVG.

Open Lightburn and then open the Burn Test SVG. You can change the colour (Layer) of the text prior to cutting, so it will mark the measurements rather than cut.

Set the speed and power for the text and the line and press Start. This took 3 passes.

You can now test what fits best.

I found the 0.11 mm fitted perfectly, so next I could move onto the box itself.
Designing the Box
Re-opening boxes.py, I chose Flex Box 2 as my start point.

Then I inputted the sizes I wanted to use, along with the edge burn value I’d just found.

Press Generate again to create the SVG for the box.

You can see where the laser will cut the series of lines close together to make the wood curve possible. Save the file.
Cutting the Box
Re-open Lightburn and open the SVG file.

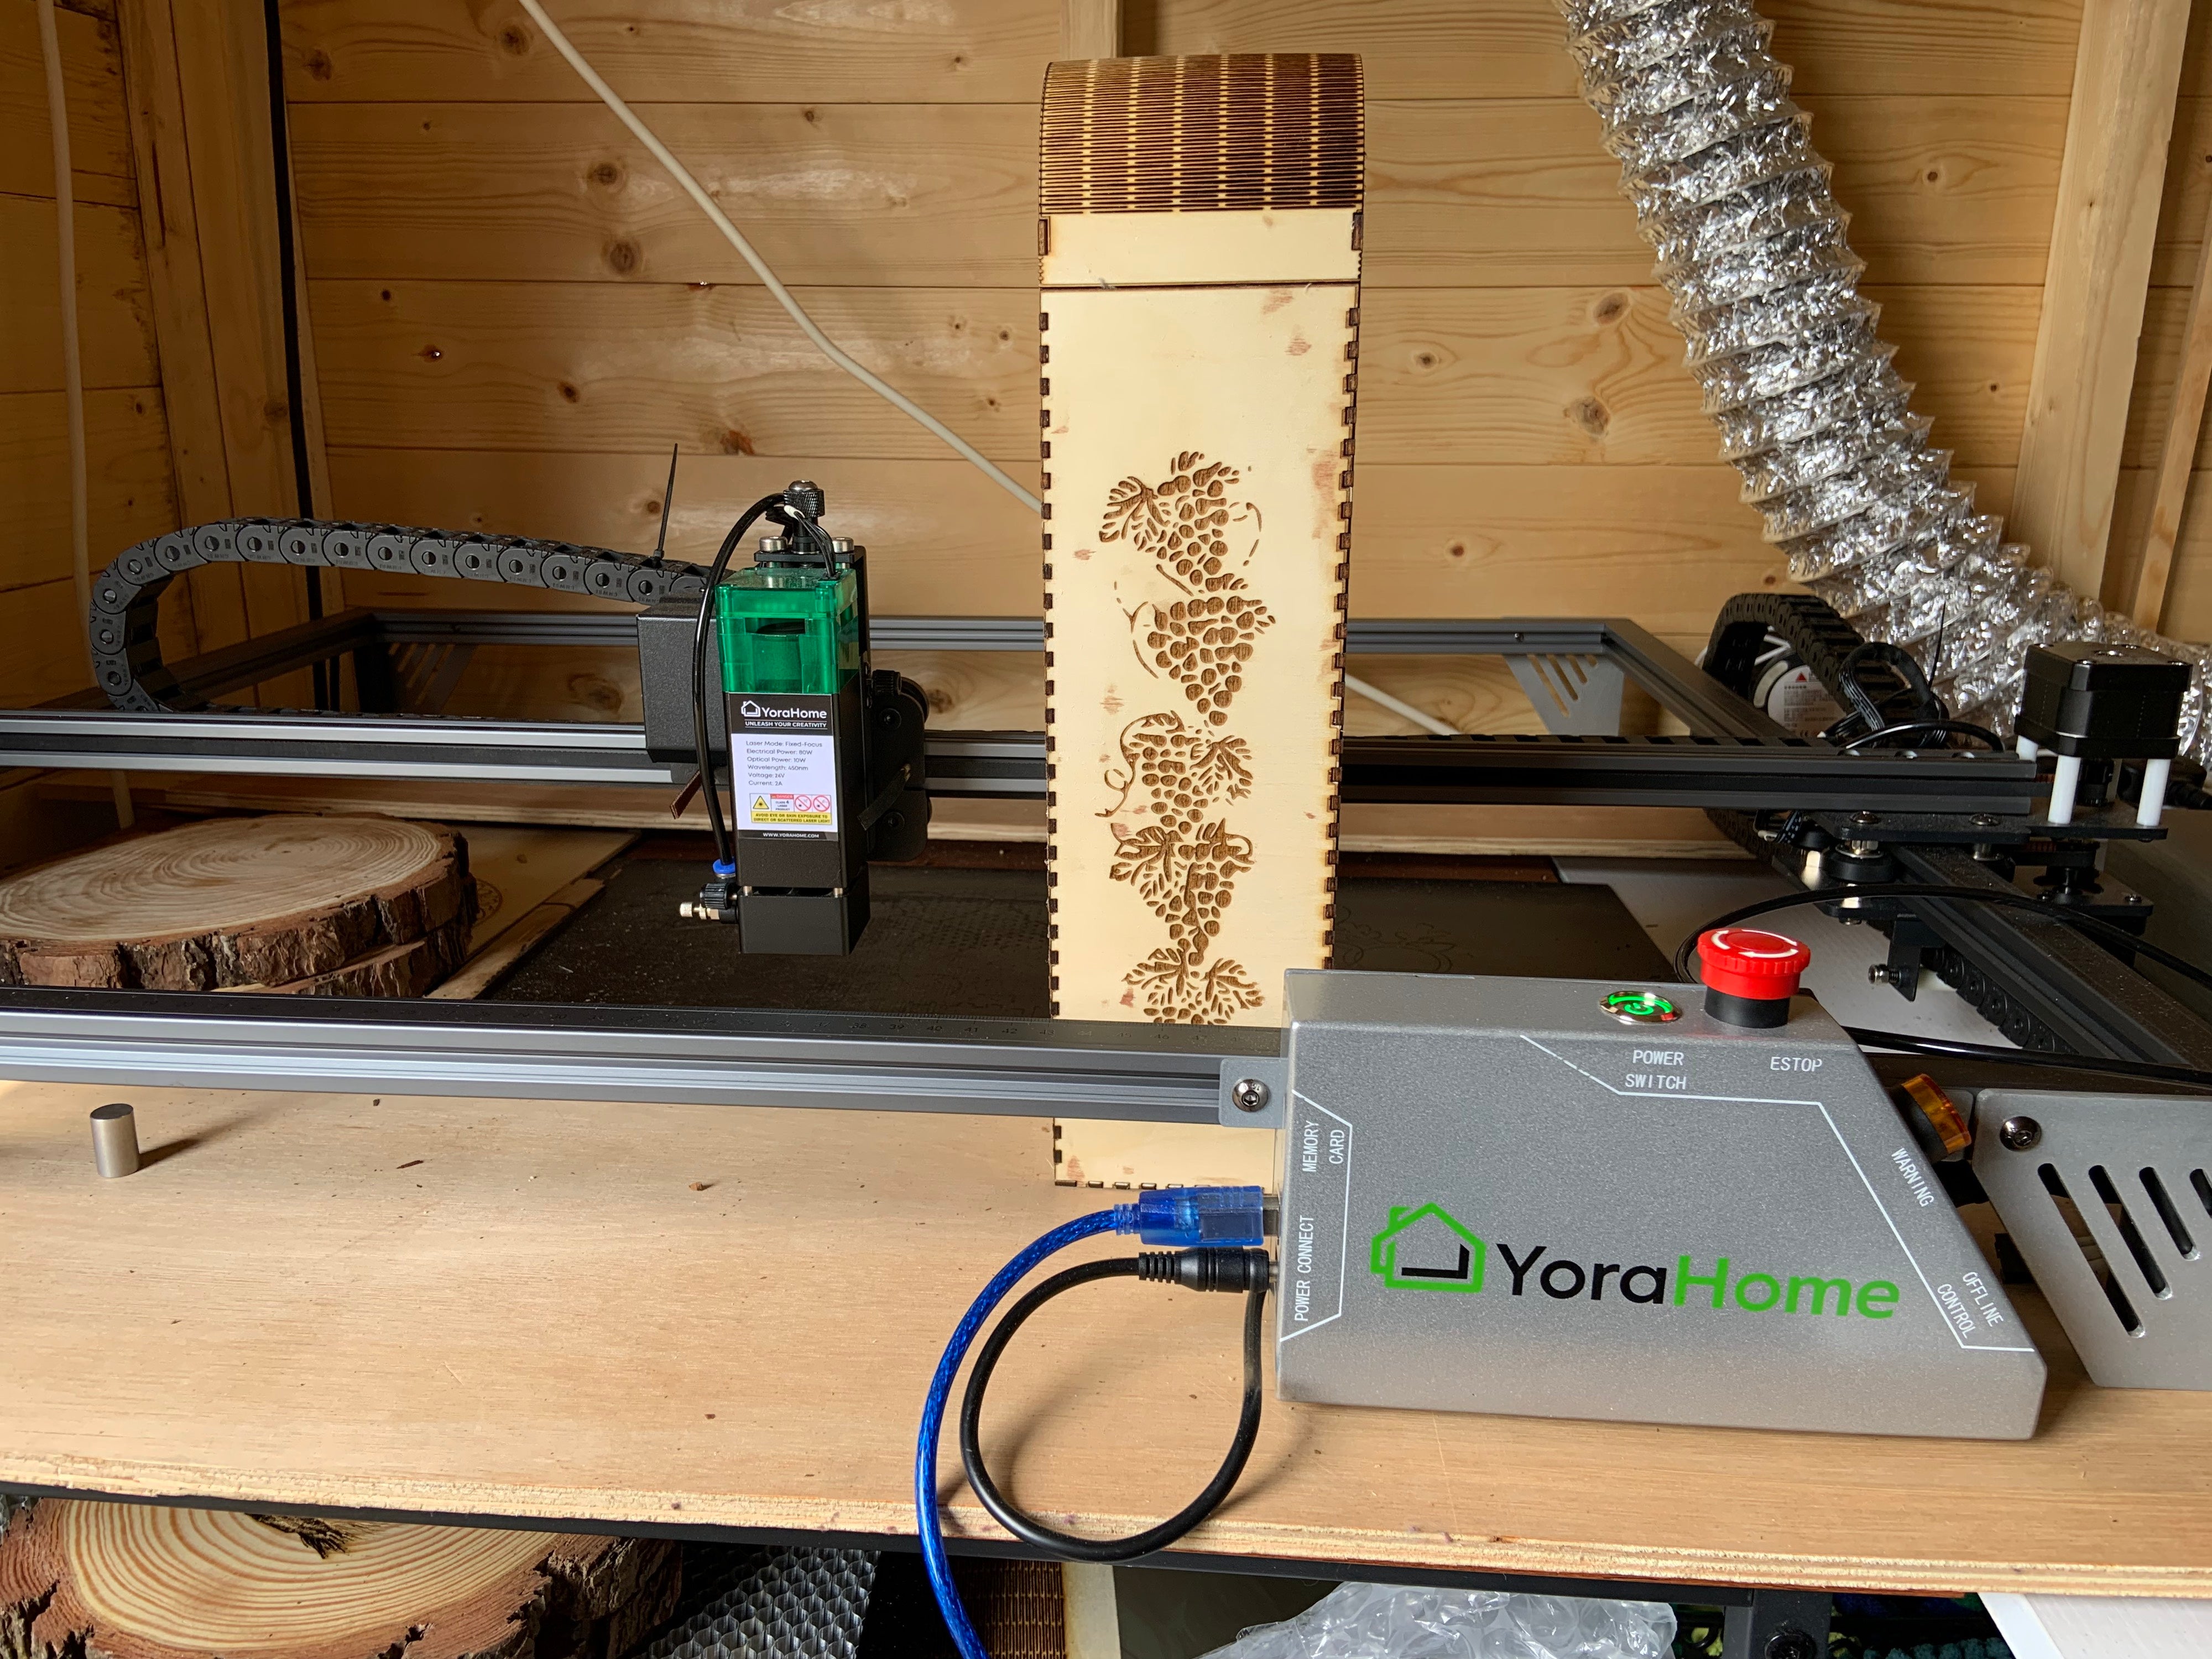
At this point you can get a bit creative with how things are laid out on the material. I needed to use 2 pieces anyway, so first set as below and because I wanted to add a little bit extra to the box, I decided to add an image of grapes on the front piece.

Set the power and speed for the box cuts and the image.

I ran the box cuts first for 3 passes and then the image for 1 pass.

Only the side pieces left.

Once all cut, it is time to put the box together. A bit of gentle persuasion and the joints make such a tight fit that they don’t actually need any glue, but some clear wood glue will just make it super safe for when I put the bottle of wine inside!
And yes, that is blood, hahahahaha, suffering for my art as they say – if truth be known, I actually caught my hand on an engraving bit on the Mandrill, and hadn’t realized until it was too late and I’d got it all over the box.
Besides that small flaw, I have to say I am completely and utterly impressed with what I managed to achieve on the 6650-Pro, the joints fit together perfectly, the lid curves exactly as it should and the catch is in the perfect position.

Just imagine the possibilities the YoraHome 6550-Pro can give you. I can’t wait to try something else now, the offerings from YoraHome just get better and better. Join the Yorahome family and see what you can create.


Get The Freshest Content
Straight To Your Inbox
Join over 3,000 creators who receive premium content, exclusive discounts, and all the must-know info on a weekly basis.