


 LIMITED TIME
Last Sale Of The Year!
Up to 20% off at checkout on the YoraHome Store.
Grab All The Yoras You Want!
Carving Machines
15% off Yora 3018-Pro Machine
15% off Yora 3018-Pro Accessories
$100 off Yora SilverBack Machine
8% off Yora SilverBack Accessories
15% off Yora Router Bits
Laser Engravers
15% off Yora 6550 Machine
15% off Yora 6550 Accessories
15% off Yora Mini Laser Engraver
15% off Yora Draw
$200 off Yora CO2 Laser Engravers
$200 off Yora Fiber Laser Engravers
3D Printers
$10 off Yora Ender-3 V2
$30 off Yora CR-6 SE
$40 off Yora Ender-5 Pro
→Each printer comes with 3x Free bonus items
3D Filaments And Accessories
20% off Yora PLA Filaments
15% off Yora 3D Printers Accessories
1x Free Yora Filament Dryer For 1x 3D Printer + 5x PLA Filaments or 10x PLA Filaments
Woodworking Tools: 20% off
Home And Office Accessories: 20% off
Get Amazing Free Items With The Gorilla Bundles!
#1: 1x Free Yora 3018 Essential Bits For 1x Yora 3018 + 1x Yora 6550
#2: 1x Free Yora Rotate Module For 1x Yora 6550 + 1x Yora Draw
#3: 1x Free Yora Filament Dryer For 1x Yora 6550 + 1x 3D Printer
#4: 1x Free Yora TLC Rotary For 1x Yora 3018 + 1x Yora 6550 + 1x Yora Draw
#5: 1x Free Yora 6550 Z-Axis, Drag Chain, Air Assist and 3D Led Lamp For 1x Yora 3018 + 1x Yora 6550 + 1x Yora 3D Printer
Terms Apply
Getting To Grips With Carveco | How To Add Text And Images (Part 3)


Quick catch up if you’ve missed it, if you own a YoraHome CNC Router, you need to find your order number and get yourself signed up for the 90-day Free Trial via this link.
In the previous article, I went through the very basics, so let’s crank this up a bit and start to see what this software can really let us do. I’m going to look at adding Text and Images and how to address issues that can come up.
So, going back to the workspace from the previous blog, you may have noticed the text wasn’t perfectly spaced, so trying something else:

You can see that with the font I’d chosen, the “R” and the “A” are too close together.

Point and click to select the text then right click and a menu opens where you select Ungroup All.

Now you can select each letter individually, i.e., the “Y”.

Using the keyboard arrows, you can move the “Y” slightly to the left.

Then the “O”, notice that since you ungrouped all, the O is in 2 separate vectors – move both.

Move the “R”.

Check that the text looks ok and with the arrow select tool (top icon in left menu), draw an oblong around the text or use Ctrl & A, this selects all the letters at once.

Right click to re-open menu and select Group Vectors.

This has now re-grouped the letters.

From here, you can choose your toolpath type, set the tool etc. Save your toolpath, go into Easel and carve.
When it comes to adding an image to your workspace, this is where Carveco really earns its reputation!
Begin with a New Model.
Go to File & Click Open – as you would in most software programs.

This opens files on your computer where you choose which image you want to use. 
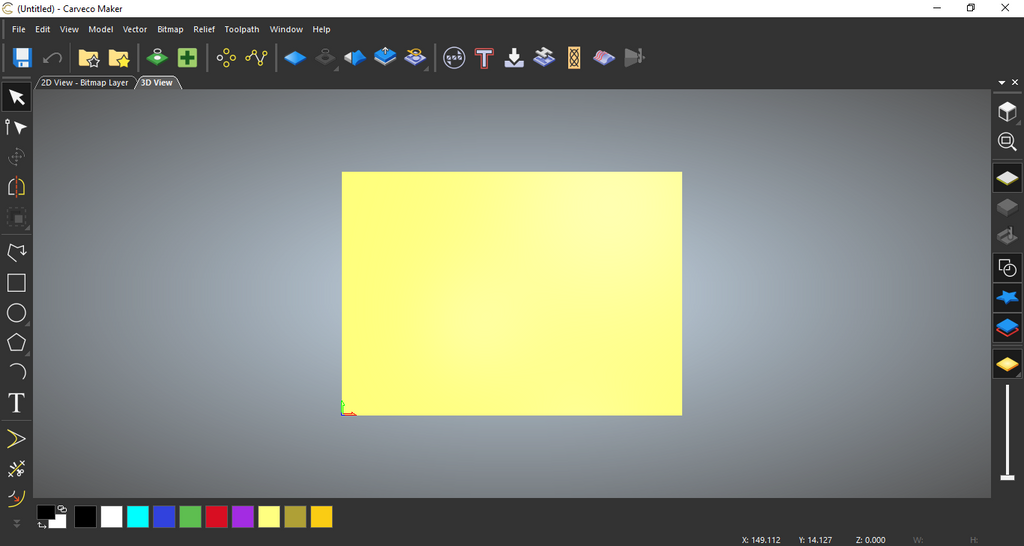
Click on the file you want and this will open the image in the background and let you set the size height and width.

Once set, then click OK.

This opens your bitmap image, or whatever you have chosen – it looks all blocky and uneven, not ideal for carving!
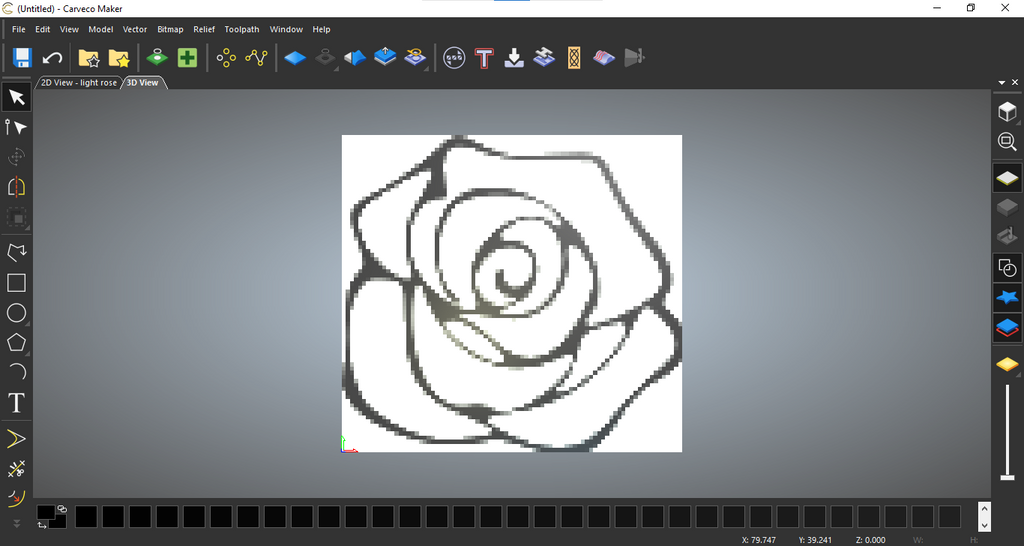
Click on the Bitmap to Vector icon on the top toolbar.

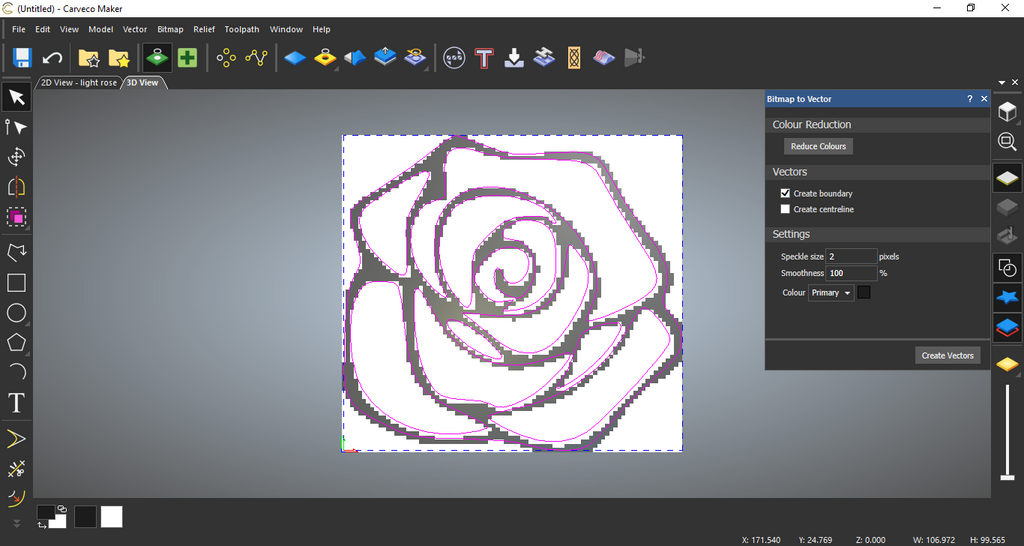
This opens the Bitmap to Vector menu.

Click on Reduce Colours on the menu and another box opens with a slider bar, reduce the New Maximum Number of Colours to 2 and click Apply.

This opens your image with a primary and a background colour (black & white), next click Create Vectors.

Vectors lines in pink are generated.
Then close the Bitmap to Vector Box.
Click on Toggle Front Relief Icon.

This removes the background and image and leaves just the vectors.

Click on Toggle Front Relief Icon again, to make it easier to view.

Now, we can see clear sharp lines, but Carveco has another fantastic feature to use, click on Vector Doctor on the top toolbar.

This opens the Vector Doctor menu, looking at the top part of the menu, when all of the vectors are selected, click on Open.

On this image all the vector lines turn black – there are no Open Vectors.

You can re-select (Ctrl + A) the vectors and try each of the options, closed, duplicates etc. On selecting Clockwise, only the exterior vector turns pink.
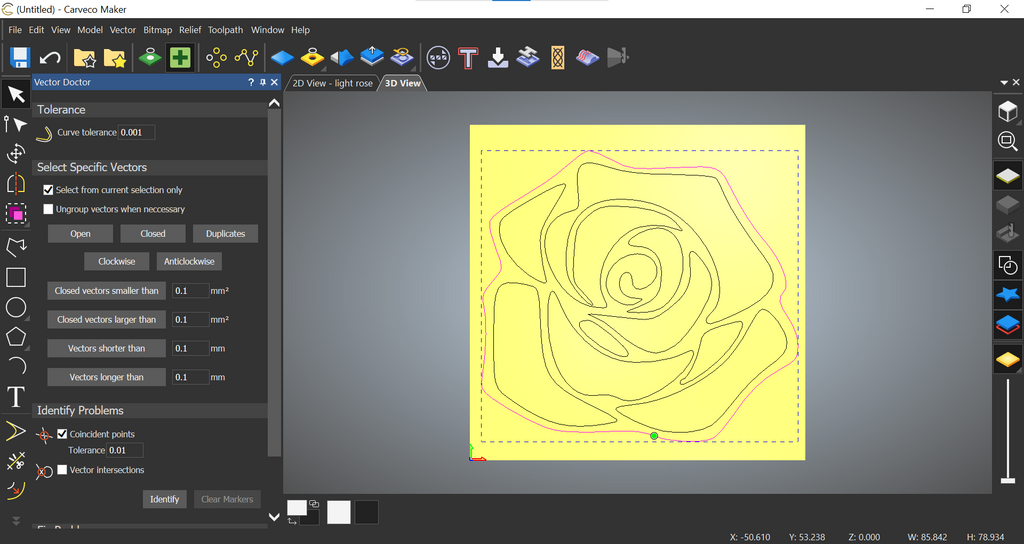
On selecting Anticlockwise, the rest of the lines turn pink.
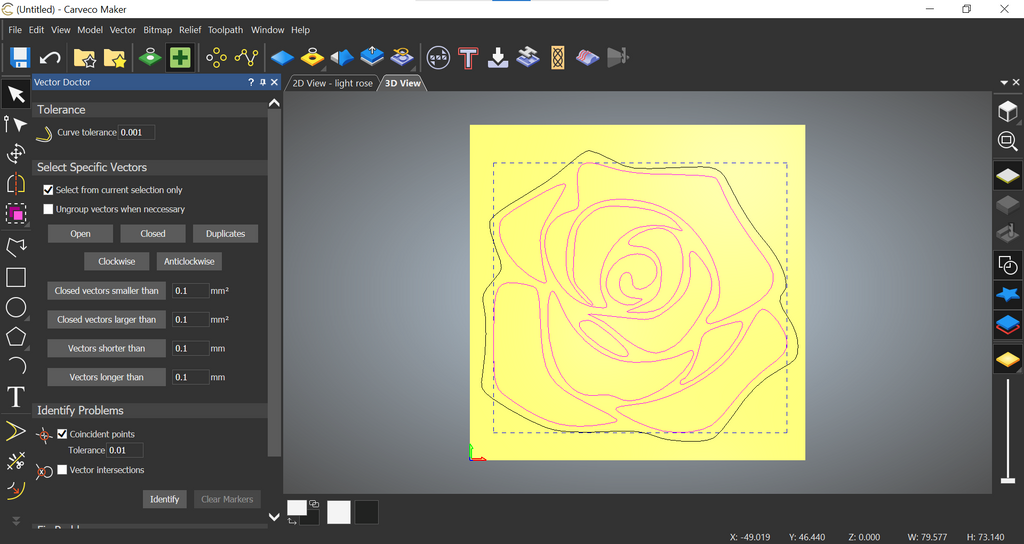
Next, look at Identify Problems, I will not claim to completely have a handle on the Identify Problems section, but put simply, issues will be shown up with small red circles, you may need to zoom in to see them and you can fix them.

The best advice I can give at this point, is watch the excellent Carveco video on Vector Doctor via Training : Carveco Fundamentals as it explains it far better than I could.
Once happy with the vectors, you can save your toolpath and so on and then carve your image.

Again, this is not the most impressive piece I have ever done, but the next piece up is going to be worth it, bit by bit.
It’s a great start to using this fabulous software, bear with me and with these fantastic machines and great software we will all be creating stuff we only ever dreamed of till now!
Join in the fun, get your Yora CNC Carving Machine 3018-Pro and sign up for your free trial of Carveco Maker!
Next up, I’ll be looking at Relief & 3D Carving.


Get The Freshest Content
Straight To Your Inbox
Join over 3,000 creators who receive premium content, exclusive discounts, and all the must-know info on a weekly basis.