


 LIMITED TIME
Last Sale Of The Year!
Up to 20% off at checkout on the YoraHome Store.
Grab All The Yoras You Want!
Carving Machines
15% off Yora 3018-Pro Machine
15% off Yora 3018-Pro Accessories
$100 off Yora SilverBack Machine
8% off Yora SilverBack Accessories
15% off Yora Router Bits
Laser Engravers
15% off Yora 6550 Machine
15% off Yora 6550 Accessories
15% off Yora Mini Laser Engraver
15% off Yora Draw
$200 off Yora CO2 Laser Engravers
$200 off Yora Fiber Laser Engravers
3D Printers
$10 off Yora Ender-3 V2
$30 off Yora CR-6 SE
$40 off Yora Ender-5 Pro
→Each printer comes with 3x Free bonus items
3D Filaments And Accessories
20% off Yora PLA Filaments
15% off Yora 3D Printers Accessories
1x Free Yora Filament Dryer For 1x 3D Printer + 5x PLA Filaments or 10x PLA Filaments
Woodworking Tools: 20% off
Home And Office Accessories: 20% off
Get Amazing Free Items With The Gorilla Bundles!
#1: 1x Free Yora 3018 Essential Bits For 1x Yora 3018 + 1x Yora 6550
#2: 1x Free Yora Rotate Module For 1x Yora 6550 + 1x Yora Draw
#3: 1x Free Yora Filament Dryer For 1x Yora 6550 + 1x 3D Printer
#4: 1x Free Yora TLC Rotary For 1x Yora 3018 + 1x Yora 6550 + 1x Yora Draw
#5: 1x Free Yora 6550 Z-Axis, Drag Chain, Air Assist and 3D Led Lamp For 1x Yora 3018 + 1x Yora 6550 + 1x Yora 3D Printer
Terms Apply
10 Things You Should Know About LightBurn Software

Perhaps you already got yourself a 6550-Pro Laser Engraver or 3018-Pro with laser module and have been using LaserGRBL up to now, or perhaps you’re still looking at what to get and what your software choices are.
I’ve said it before and I will keep saying it, you’ve picked what are probably the best DIY laser engravers available today, if you’ve already tried either of them out with other software you know what they are capable of, you might just want a bit more from the software to catch up with your imagination.
LightBurn has so many additional features and options, it can keep up with what you want to do. So here are 10 things you should know about.
1. There’s a free trial for 30 Days
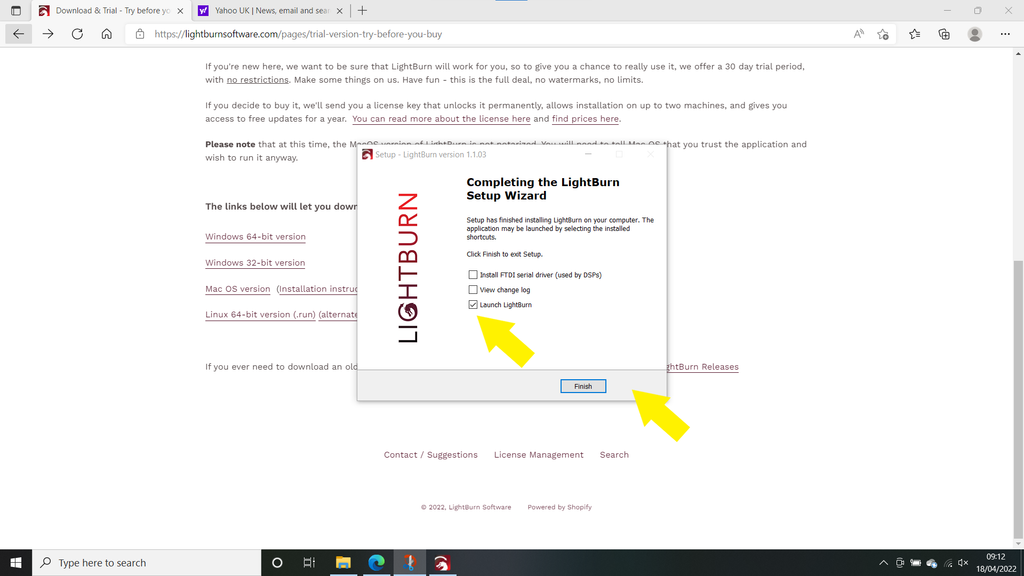
You can download the LightBurn software by going to the website www.lightburnsoftware.com. You don’t even need to enter a credit card number to use it for 30 days, after that, you would need to buy a license.
To download the trial click on Download / Trial at the top of the screen.

This opens the page that explains how the trial works.

Scroll down the page and choose the version you need.

As with any download, just follow the steps to install the software.

Then create a desktop shortcut.

2. LightBurn is easy to install and set up
Launch is the perfect word for it. You don’t just start this, you take off with it!
The LightBurn interface will open. (Looks intimidating, I know, I avoided using LightBurn for 18 months or so when I got my first laser, but its not so complicated, I promise).
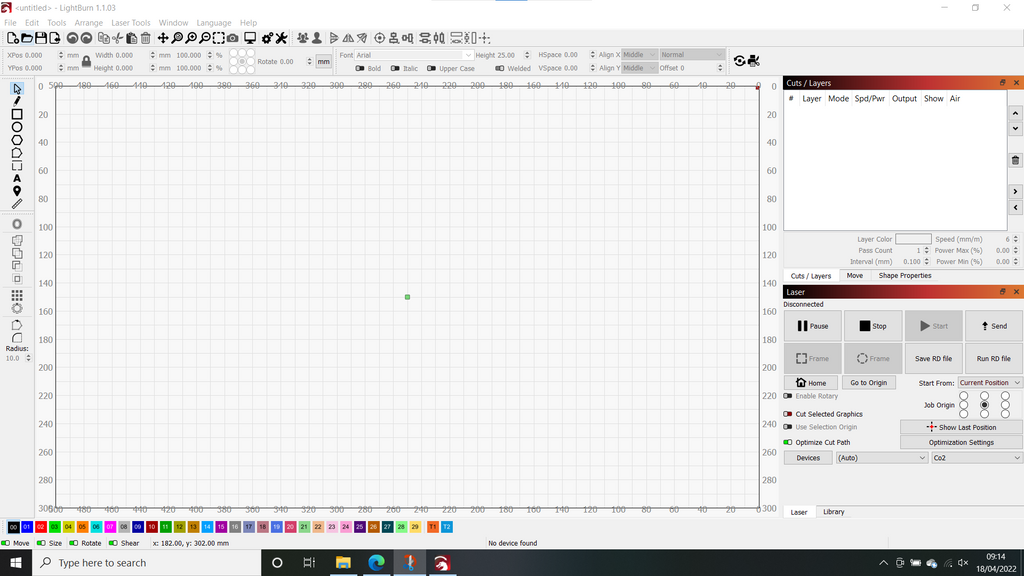
First thing to do – click on Devices on bottom right and a box will open.
Click Find My Laser (your box will be blank, I use LightBurn on everything now, so my machines are all listed).

Connect via the USB cable and follow the prompts.

Once set up, it will ask what you want to call it and check the dimensions of the work area.
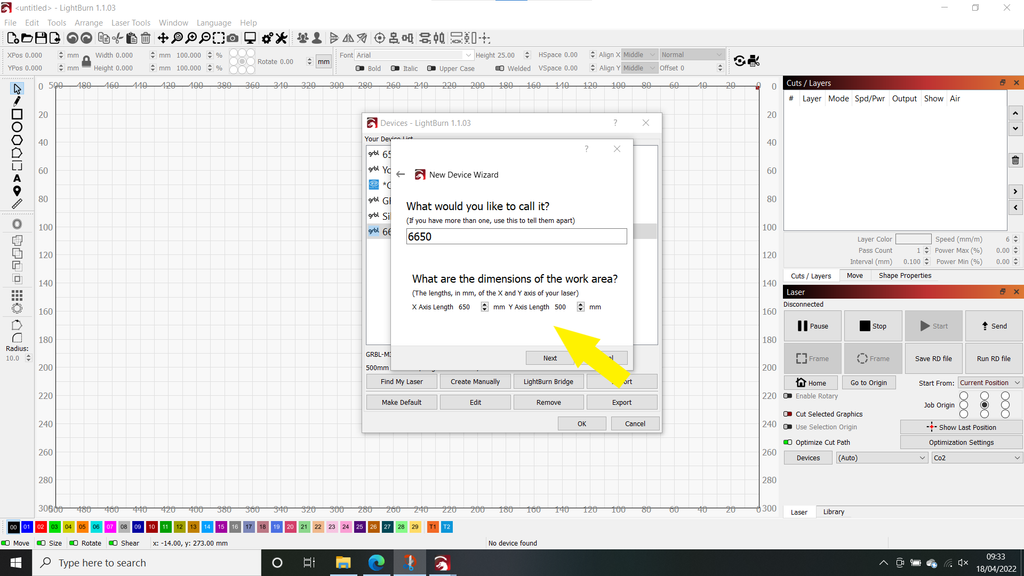
Then the origin and it will ask about Auto-Homing. Standard machines such as the Yora 6550 and Yora 3018 do not have homing, so do not adjust.

On completion of set – up, you will see a summary. Click Finish.

Now your machine will be listed on the bottom right and the workspace will match your machine.

3. You can use different layers with LightBurn
When I said it looks intimidating, this was where I was baffled to begin with. But, it's easy once you get your head around it. Each of the colours can represent a different set of speed/power levels, so you can have one part of your design very dark and another bit much lighter. Just bear with me here.

Another great thing about LightBurn is that you can draw and write within it. On the left-hand side, click on the square shape and draw a square. You will see on the top right it has now used the Black layer with Line Mode and set its speed & power.

Using the select arrow at the top of the icons on the left will select the square so you can now copy and paste 3 more.

Click on Arrange, then Align Top.

Click Arrange, then Distribute, then Distribute H-Spaced to evenly spread out the shapes.

Click on the second square, then on blue on the bottom, then on the drop-down on the top right, change to Fill.

Do the same procedure with the third and fourth square, changing the colour (layer) and then changing via the drop-down what mode it will use.

If you click on the Spd/Pwr setting in the Cuts/Layers box, it will open a Cut Settings Editor Box – lots of variables in here, but for now, just look at the power setting and change that if necessary.

Using the Jog Controls, move the laser to the start point, you can see on my workspace I use the centre (green dot), this is from the Job Origin choice in the Laser tab box.

To test fire the laser in Lightburn, go to Edit then Device Settings.

This opens device settings where you can – Enable Laser Fire Button and Laser On When Framing.

Now there is a Fire button on the Move box and Frame will also display where the edges of the design will be. Keep the % low, you don’t want to mark your material just to focus etc.

Once happy, press Start.

You can see how long it has taken and what % of the job has been completed.

When the job finishes you can see what all the different modes have done

Line is pretty obvious, Fill likewise, then Line & Fill does both the Line and the Fill, and finally Offset Fill.
4. LightBurn allow you to import multiple file formats
As with most software, if you want to bring in a file, go to File, then Open.

Navigate to Pictures, notice that it only wants to display LightBurn files, click on the drop-down and select Any Supported File – this could be any of the following:
Vector / mixed formats
- .ai - Adobe Illustrator
- .svg - Scalable Vector Graphics
- .dxf - AutoCAD Drawing Exchange Format
- .pdf - Adobe Portable Document Format
- .plt / .hpgl - Plotter / Hewlett-Packard Graphics Language
- .png - Portable Network Graphics
- .jpg / .jpeg - Joint Photographic Experts Group format
- .bmp - Windows Bitmap
- .gif - Graphics Interchange Format
- .tif / .tiff - Tagged Image File Format

Once you’ve chosen your file, click Open and it will appear on your workspace.

Adjust the size to what you want and then using the zoom and pan buttons, adjust your view.

In the Cuts & Layers box, you will see this has been brought in with Image mode. You cannot use the drop-down to change it to Line, etc.

So, I set this off and as you can see, after almost 10 minutes, it had only done 7%. I am famous for my patience, I have none, this would be far too slow for testing purposes and me. But, there is a way to adjust the image. Click on Tools then Trace Image.

This allows you to trace your image and reduce its complexity.

The image is now converted to Line Mode and have a look at the time taken.

Good reason for that, it has only done a thin line either side of the original image line.

So, I changed the Mode to Fill.

This was a much better result.

5. You can change your project settings during the burn
This must be the easiest to adjust possible. Open the Move tab while the job is in progress and select what you want to do, increase/decrease Speed and/or increase/decrease Power.

6. You can add text to an image with LigthBurn
After importing your image, you might want to add something nice, something soppy or just something rude.
To do it, import your image as before and size it.
Click on the letter A icon on the left hand side Create / Edit Text.

Click inside the workspace and the text tab will appear – you can move the text later.

Click on the Select Arrow, then on the text and move it where you want. In this second layer in the Cuts/Layers box you will see it opened in Fill mode. You can change the font, the size, etc. till you have it how you want.

I adjusted the size again and let it do its thing.

The result was as you can see.

7. You can import photographs
I am as well known for my inability to create great photo lasered images as I am for my patience, but for testing here goes.
As I was using my favourite picture in the world, of my daddy racing in the TT, I imported the picture then clicked on Spd/Pwr to open the Cut Settings Editor again and I adjusted the speed and changed the Image Mode to Dither.

I did say photos are not my forte, but here you go.

Considering I was using bamboo, I'm taking that one as a win!
8. LightBurn also offers a lot more additional features
I have barely even scratched the surface of what LightBurn is capable of. Look at all those icons,
You can mirror your image, align different elements, draw shapes, draw lines, offset shapes, weld shapes together, remove one shape from another, etc.

There are so many options it seems I find a new possibility each time I use it.
Laser Tools, Center Finder, helps you centre your image when using non-rectangular materials.


9. Video tutorials are available to get you started with LightBurn
On the home page for LightBurn, you can see a Video Tutorials link in the menu. Watch them all, then watch them again. These are professionally done videos by LightBurn.

You can find hundreds more on YouTube as well. If you’ve got a YoraHome machine, you can join the Facebook group and the members there are always happy to help guide and assist.
10. LightBurn is worth the cost
Well in my humble opinion, I really wish I hadn’t been such a baby over it at the beginning of using a laser, as my initial efforts could have been so much better if I’d used LightBurn. Do I think it’s worth the cost? Most definitely!!!
Once you have got yourself the best DIY laser engraver on the market, the YoraHome CNC Laser Engraving Machine 6550-Pro, why wouldn’t you use probably the best laser engraving software available: LightBurn?


Get The Freshest Content
Straight To Your Inbox
Join over 3,000 creators who receive premium content, exclusive discounts, and all the must-know info on a weekly basis.